Andrea’s Bathroom Vanity – part 1

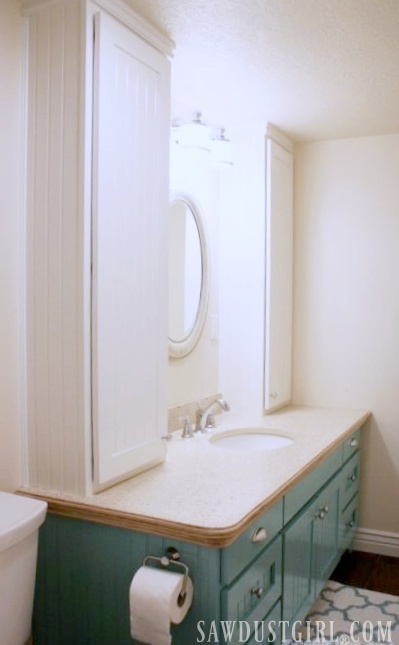
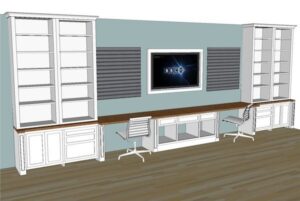
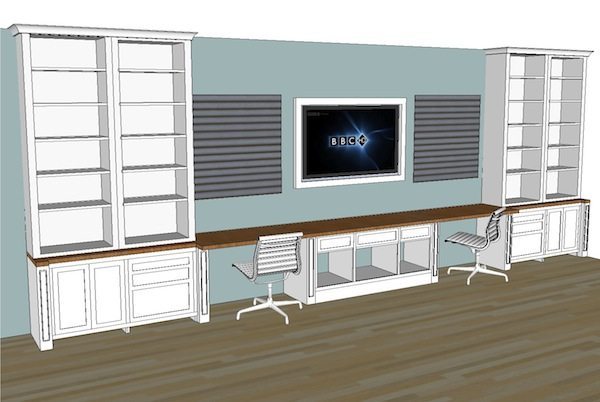
Andrea is a client who built a custom double sink bathroom vanity.  Andreas vanity has drawers and doors and then there are two storage tower cabinets that sit on top of the vanity for even more storage.  This is part 1 of her project story.

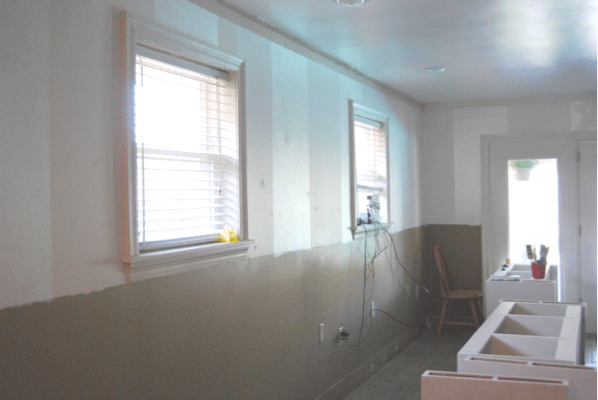
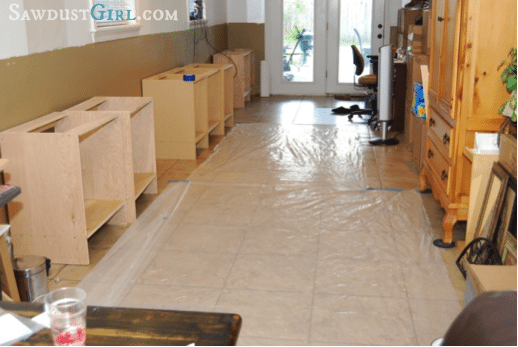
 Andrea’s Bathroom — BEFORE

Andrea's Bathroom - before

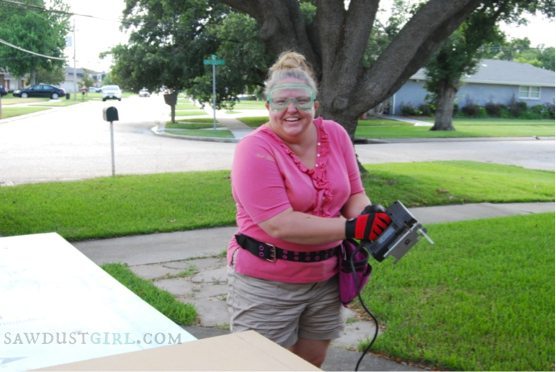
This building thing has been an education in patience and self-discovery. Patience with myself (I like to be perfect, but that is not a possible factor in building), discovering my own “creative process” (which is just a lot of thinking and planning + procrastination + feeling defeated a lot + needing a break to get over my defeat after every. single. step.), and learning to deal with the unexpected.

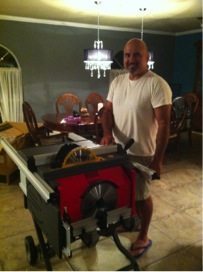
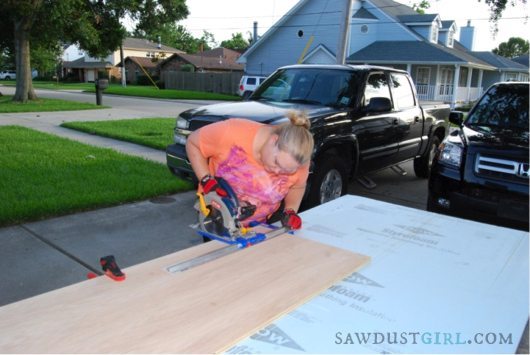
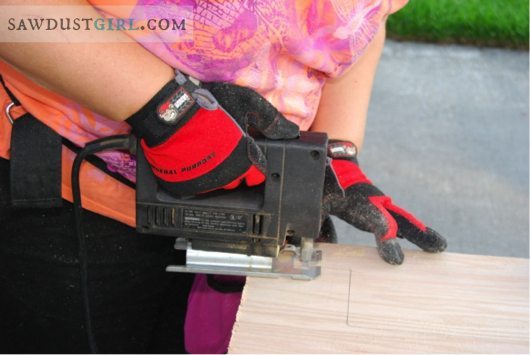
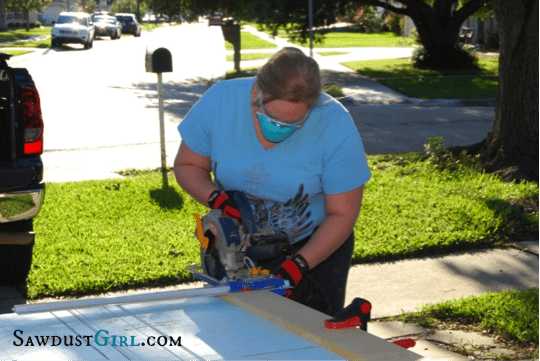
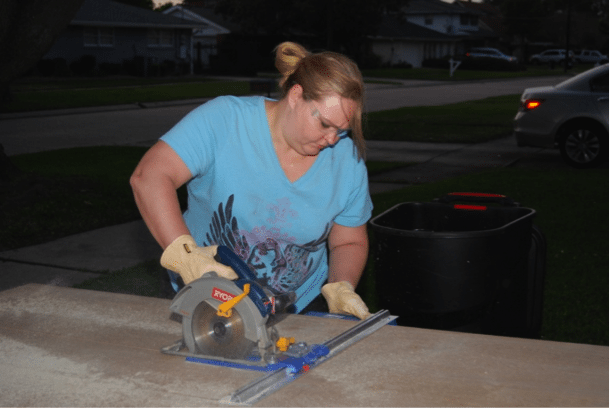
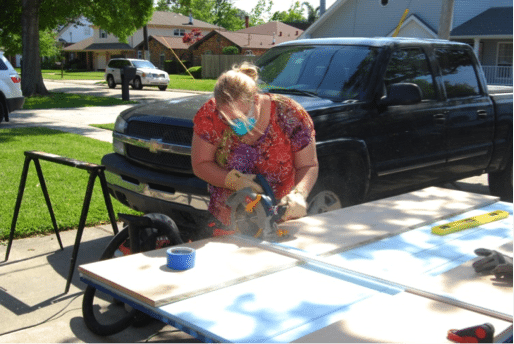
I received my instructions, bought the wood (the same day – man, this was going to be done in no time! – I thought), and then wondered how I would cut it. My husband wouldn’t let me use his table saw because he said it would, and I quote, “tear off your arms and legs.” Yeah. It is old and scary – crooked without a fence. So we hunted for a table saw. Which took a month.

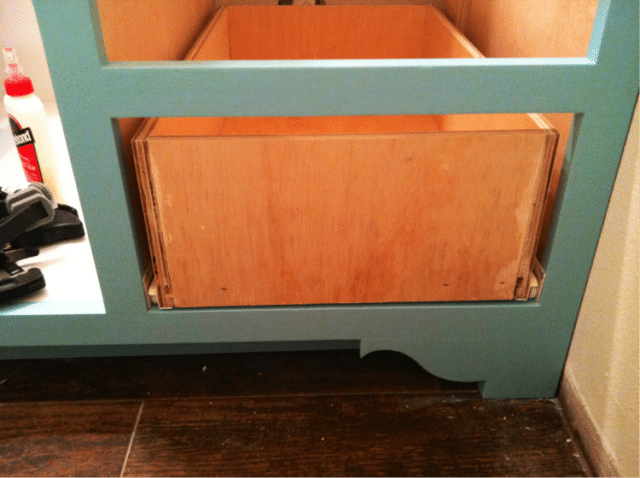
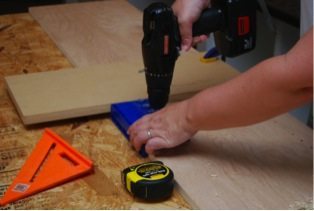
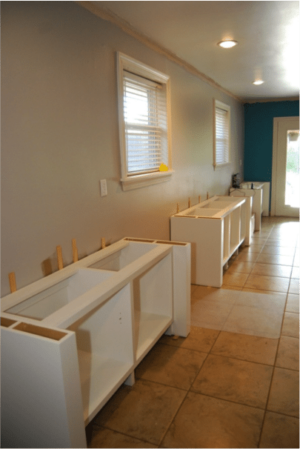
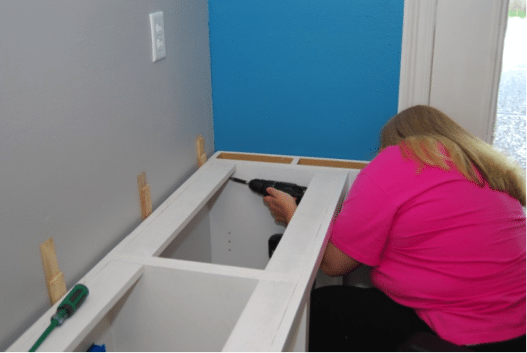
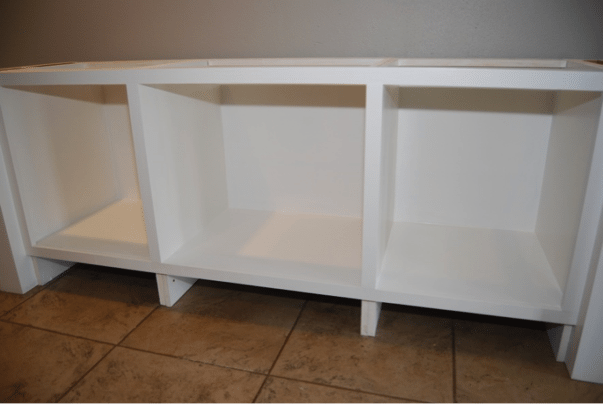
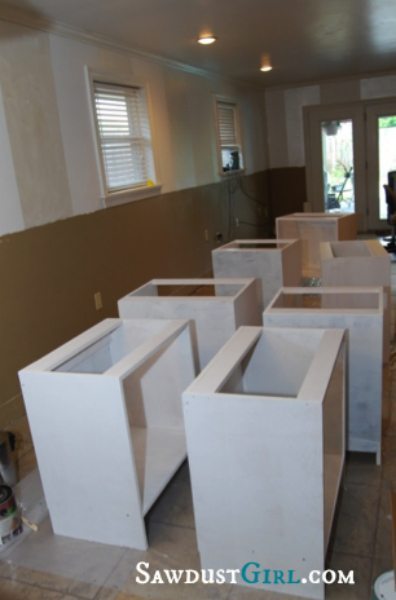
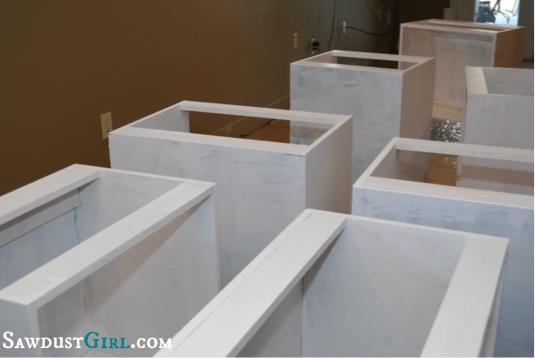
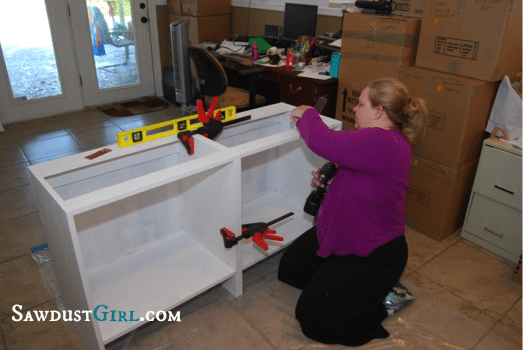
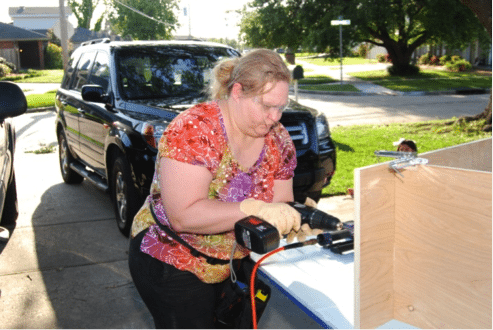
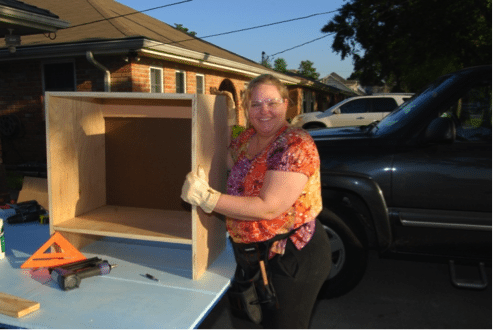
I built my carcasses after thinking about it and being too scared to do it for a couple weeks.

building bathroom vanity cabinets

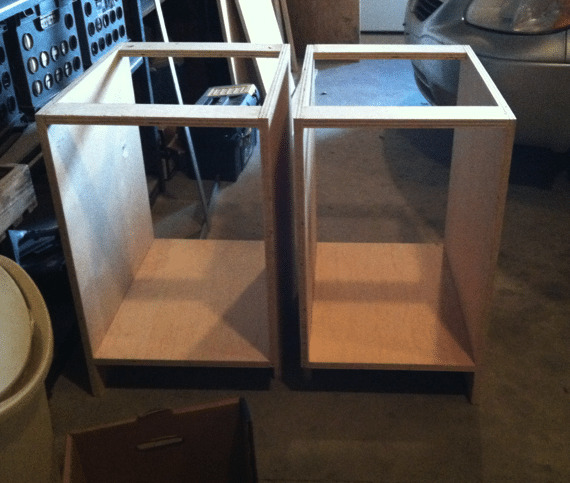
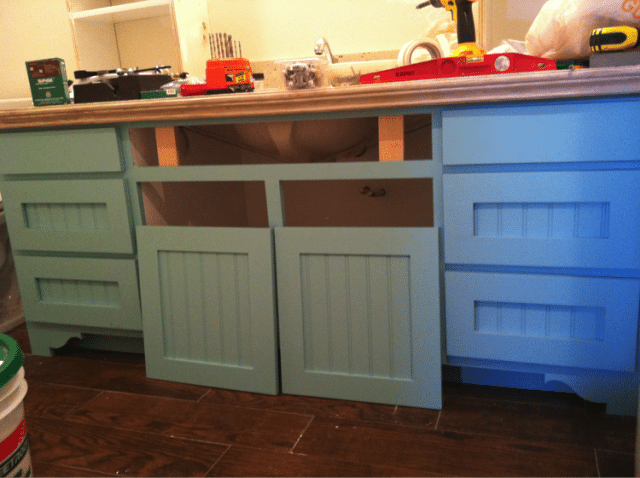
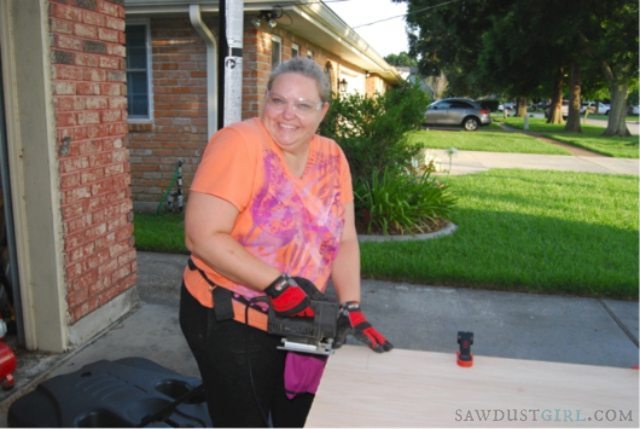
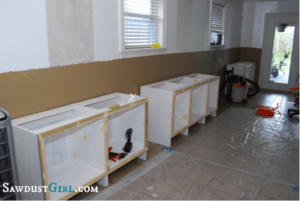
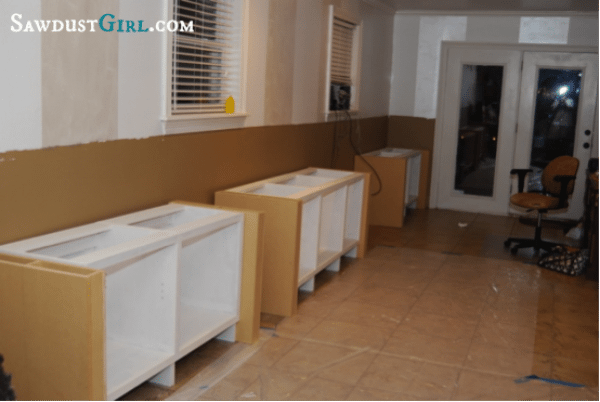
It was so exciting to get them done, I texted pictures to my husband. He immediately asked if they were square. So I held my breath and measured. Then I sent this picture to him. Because they WERE square, and I felt so relieved I could have kissed them. (but I settled for a quick hug).

Custom_Vanity_build_2

Then they sat in my garage for a month. Then they sat in my basement longer. I needed straight wood for my face frames, but none was to be found. Anywhere.

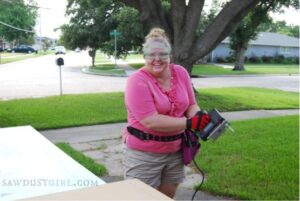
Christmas came and went. December was a complete bust. Except for the tool pouch my husband gave me for Christmas– stuffed full of my favorite mint chocolate truffles and a tape measure of my very own. People looked at me funny when I answered their, “What did you get for Christmas?” with that.

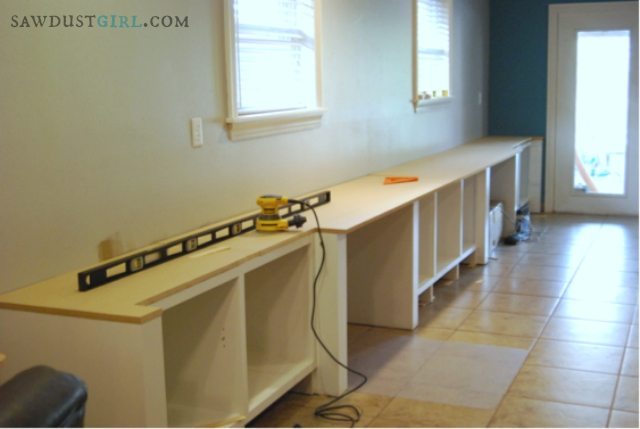
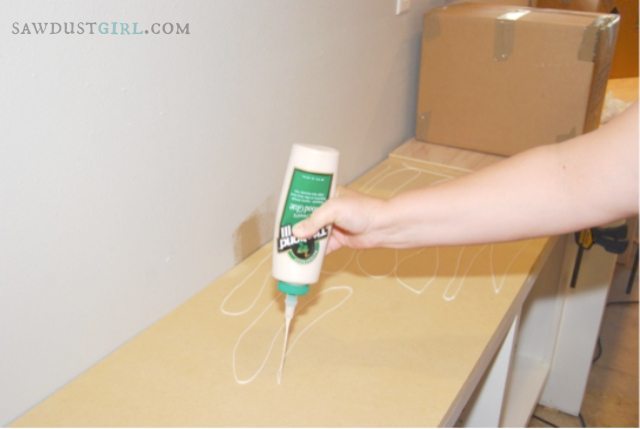
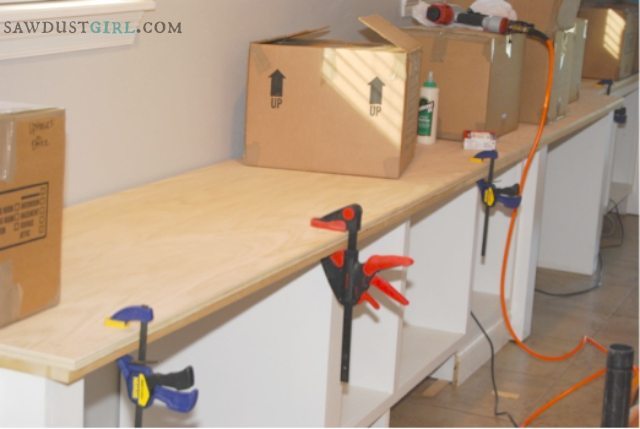
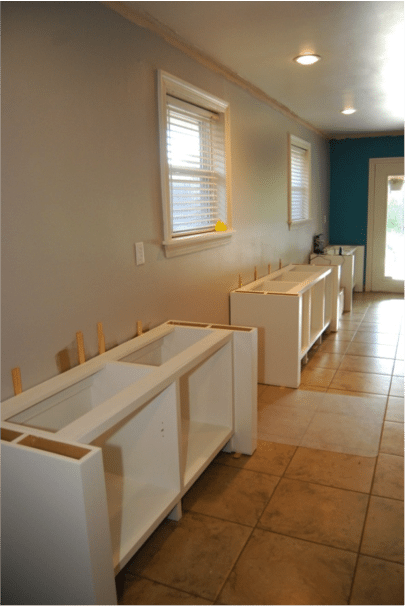
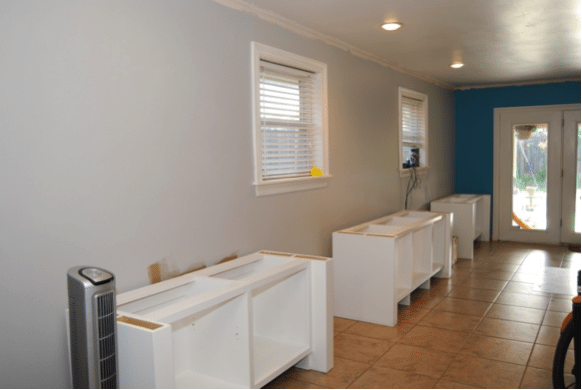
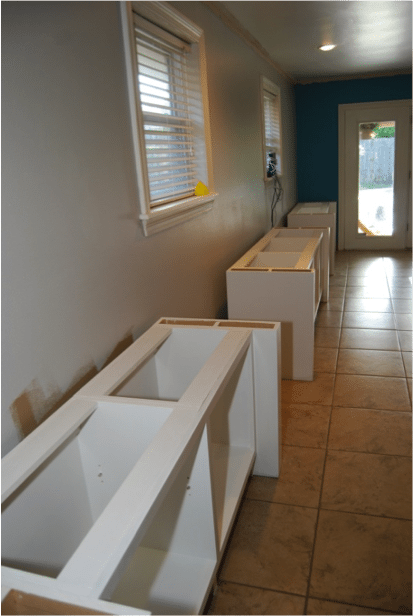
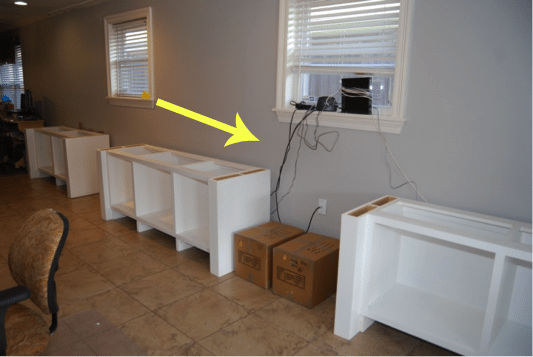
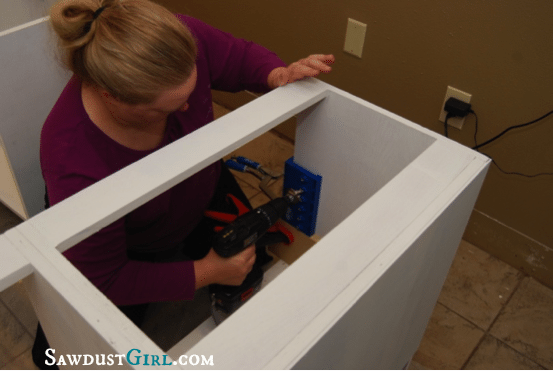
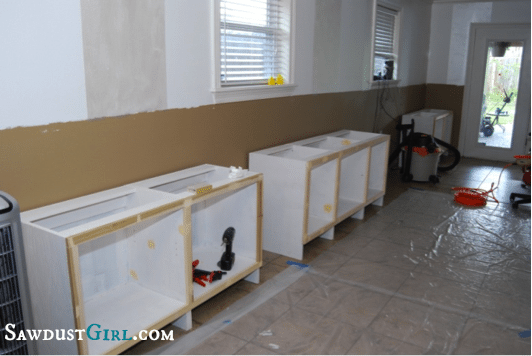
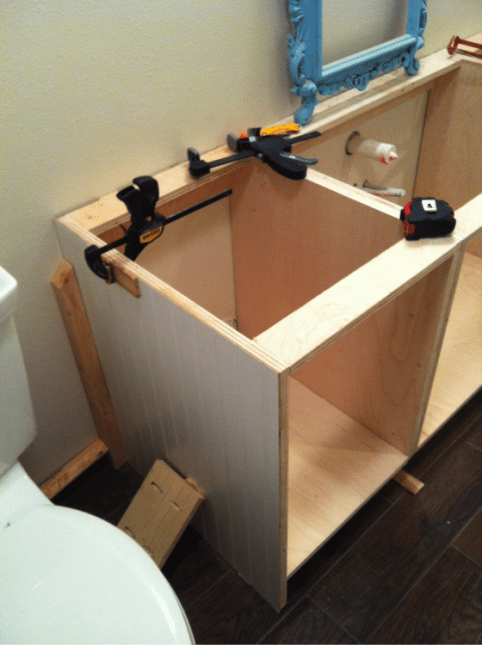
I got my husband to help me install the carcasses, cause those puppies are heavy and awkward, and I didn’t know how on earth to do it. We added beadboard to the exposed side with some liquid nails, and we clamped that down and let it dry. It made the whole basement stink. I’m pretty sure liquid nails kills brain cells. But what are a few brain cells when it comes right down to it?

installing DIY cabinets in bathroom

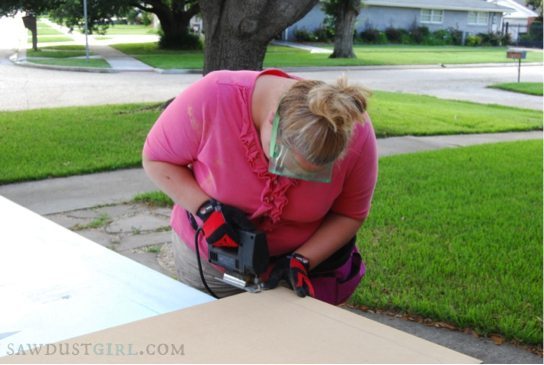
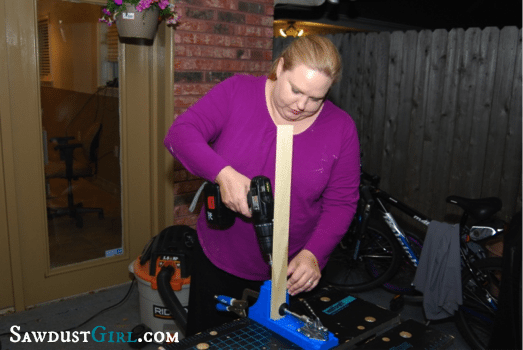
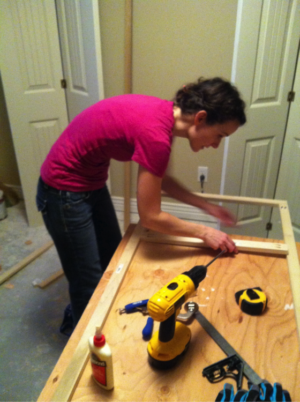
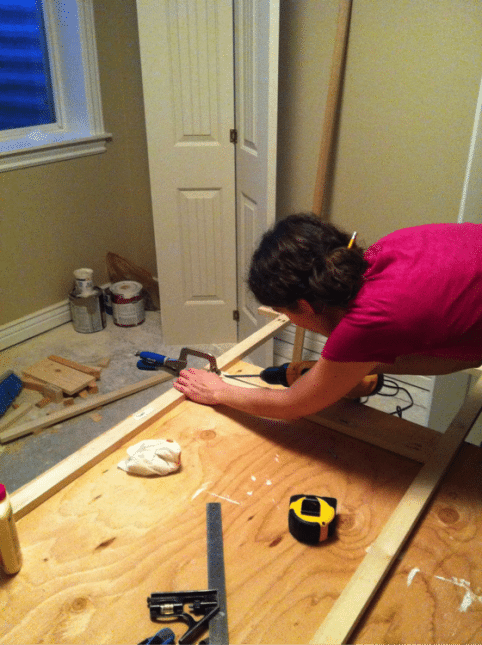
I finally just decided to make do and cut straight pieces of wood out of really long boards, and had my face frame done in no time. Why had I waited so long? It was a cinch with my awesome pocket hole jig (I had to get a feel for it first by building an end table with about 40 bajillion pocket holes in it – that took a couple hours, but then I felt confident in my pocket-holing abilities).

Building a custom faceframe for bathroom vanity
building a face frame

(Oh, did I mention I was painting and caulking every square inch of my basement in between all this? Yeah, it was a very un-fun winter at our house)

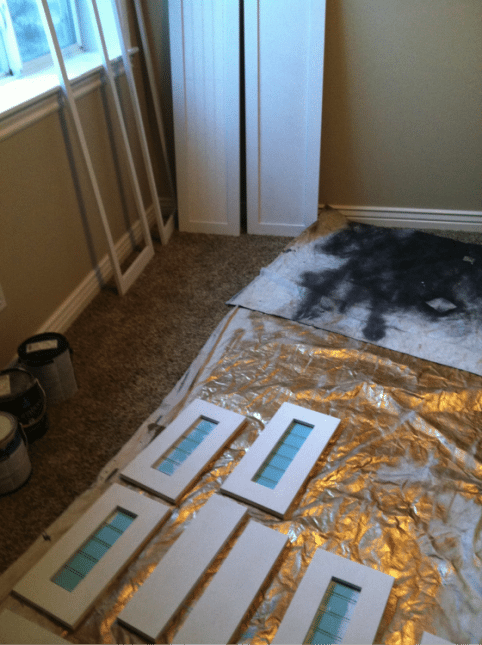
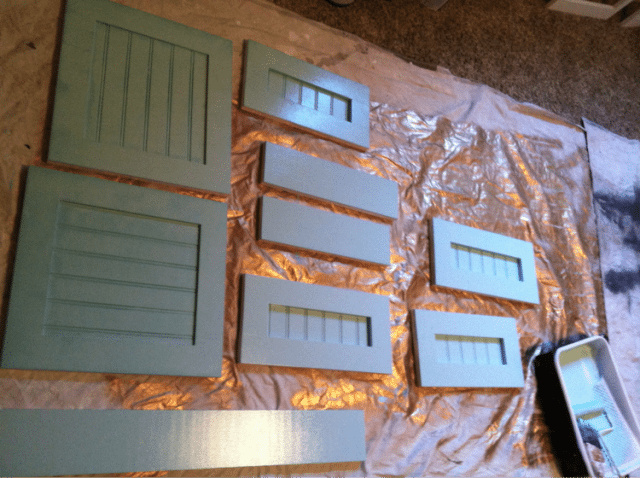
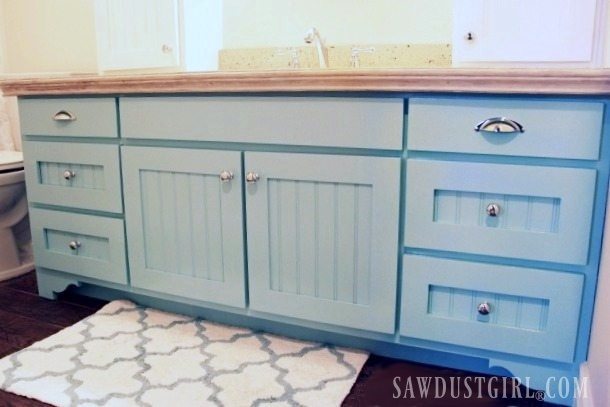
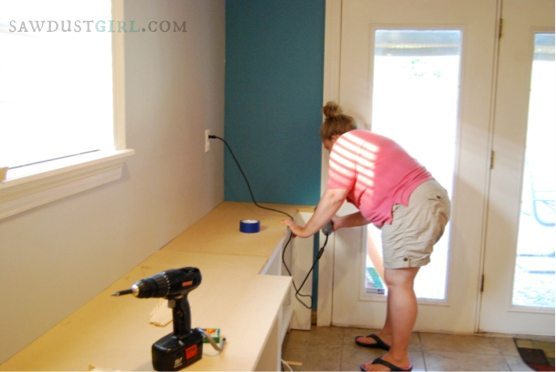
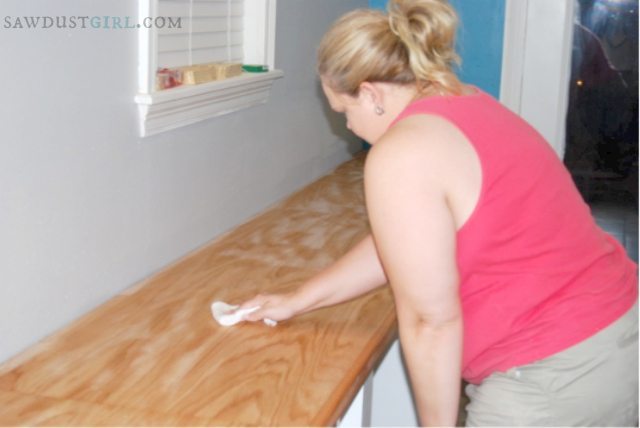
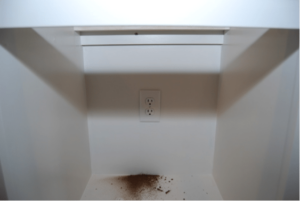
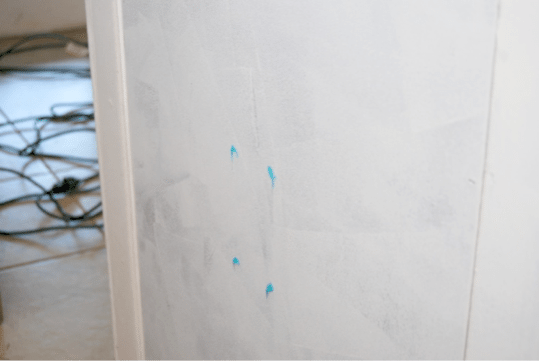
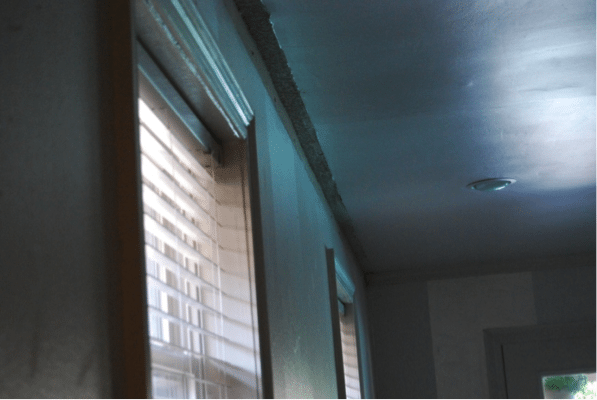
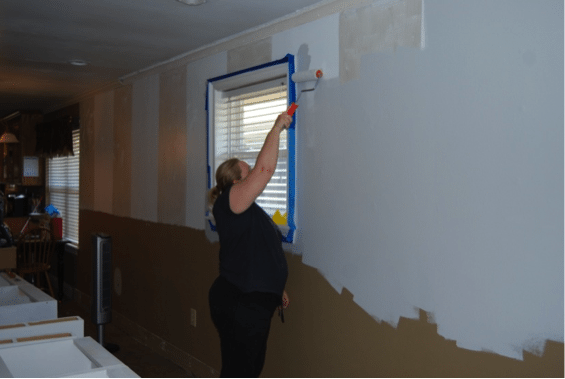
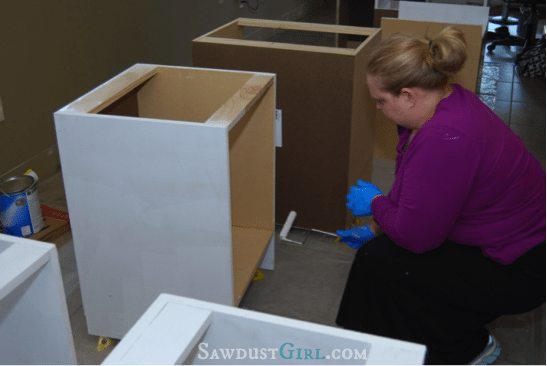
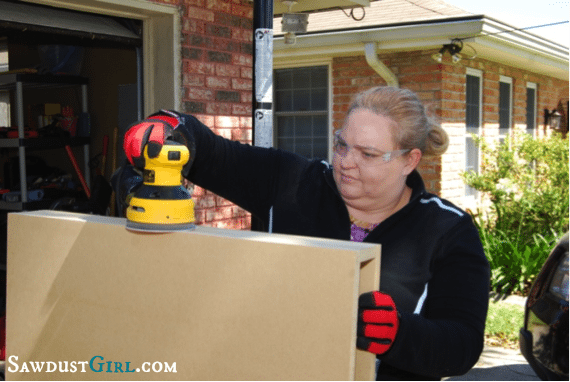
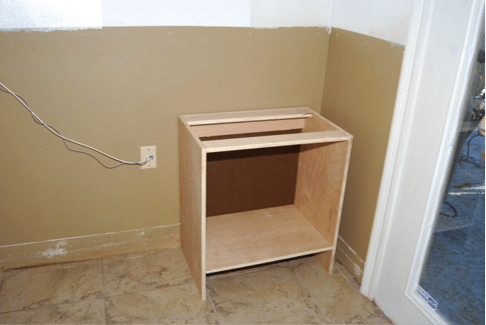
Anyway, I sanded and painted the face frame (two coats of primer, two coats of turquoise),

custom vanity faceframe

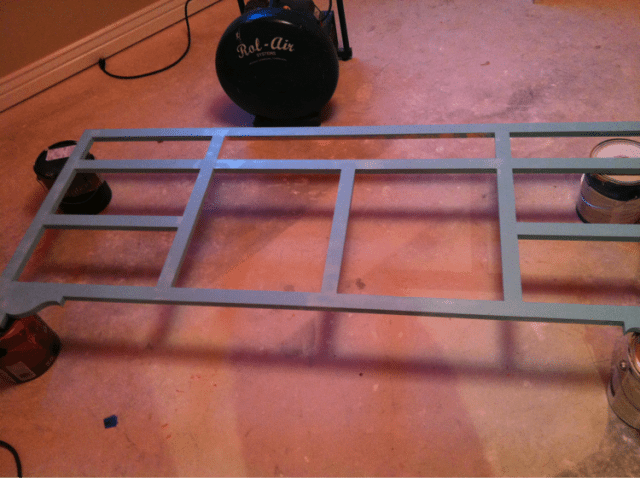
and it took me at least a week to work up the courage to install it. Then I patched the nail holes and repainted it. It looked so beautiful. Every completed stage is like heavenly shafts of light beaming down and angel choruses – the project looks so much better!

Building custom vanity cabinets in bathroom

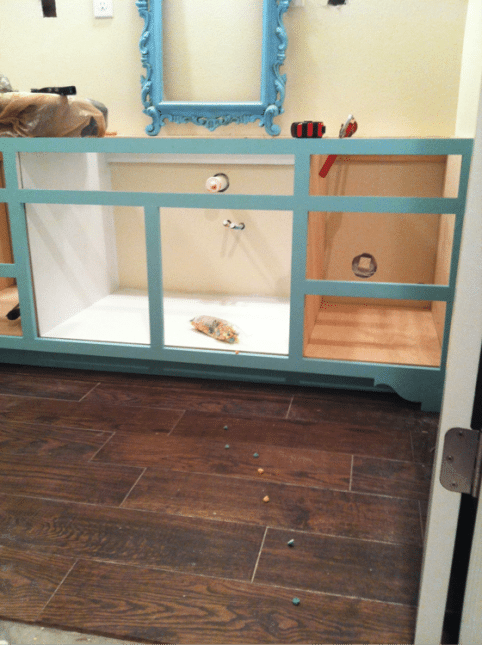
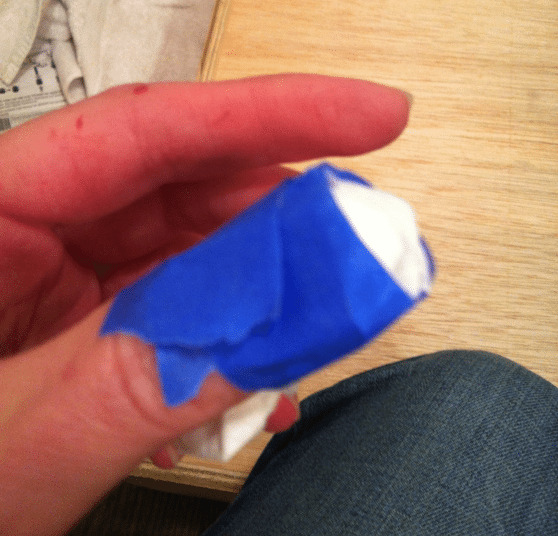
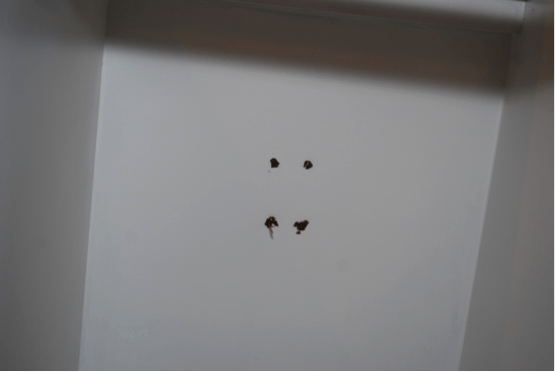
(never mind the little mints in the photo – I took the picture for my friend who knew I was feeling overwhelmed, and suggested I lure someone into the bathroom to finish my project for me…it didn’t work, just in case you wondered.)

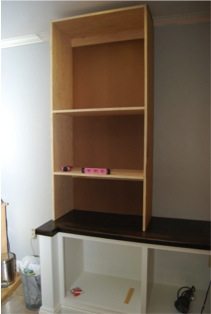
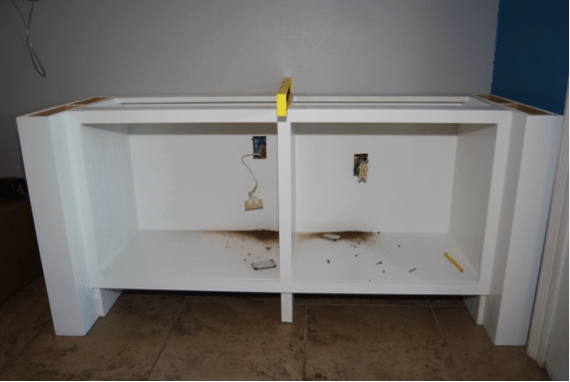
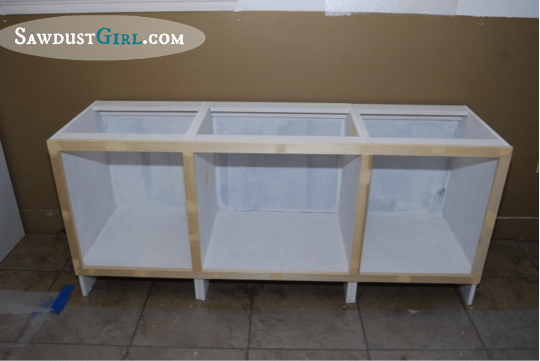
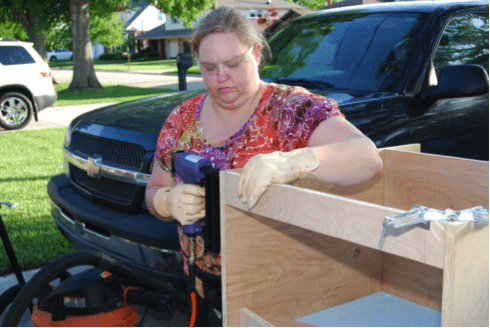
I built my upper carcasses, but had to wait for counter tops before I could finish them. In the mean time, carpet was installed downstairs, so I lost my workspace. The weather was nasty (as it is 8 months out of the year here), so it got REALLY hard for me to find the will to work on my project. I am not much (at all) for being cold and/or uncomfortable.

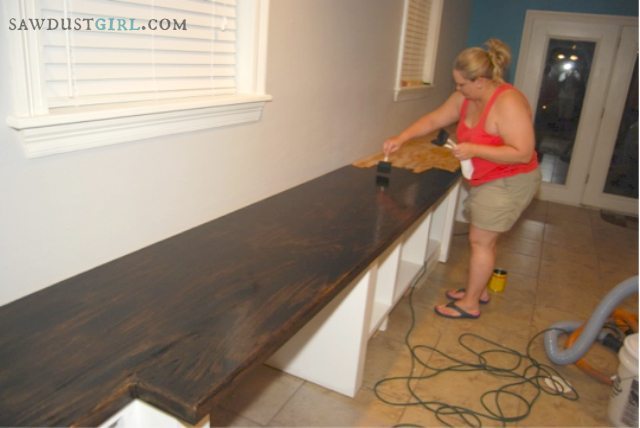
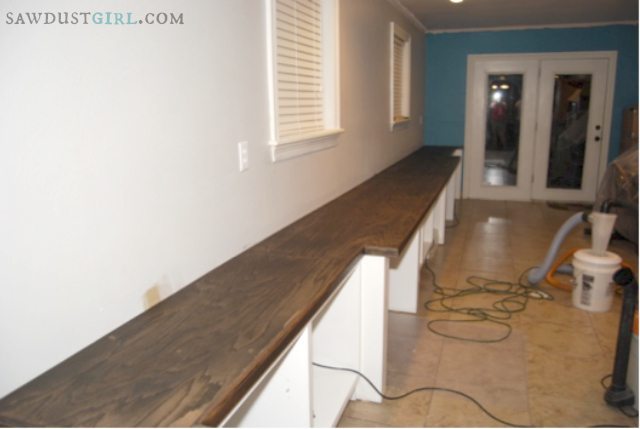
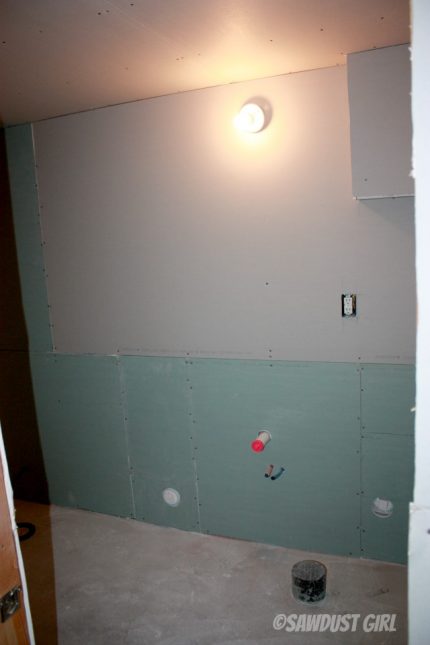
Like every phase of this project, the countertop phase was a one step forward, two steps back experience. It took a month for the counters to be poured and ready (after much debate, we settled on decorative concrete). Then it cracked in half on the way to deliver it to my house. They had to start over. Then they installed the sink, and we discovered that the drain (which we had never thought to look at) was way too high. We tried to find a plumber willing to move it (so we wouldn’t have to buy a new sink and faucet or rip out the cabinets), which took some time. Then the holes in our brand new sheetrock that resulted were daunting and frustrating. Like, you guessed it, everything else. To which lead me to share my inner monologue with you via a daily journal so you can accompany me on the duration of this journey.

See Andrea’s completed project here.

Andrea’s Bathroom Vanity – Part 2

This is Part 2 of Andrea’s bathroom vanity build story.  Read part 1 here.

diy custom vanity cabinets

February 22

Today I built one drawer. It’s way too small (by about ¼”), but I don’t care. After my last experience, I am thinking too small is better than too big, and I am erring on that side of things. I need to go buy more wood, but now I’m kind of wondering if I can just use the old tattered pieces from the janky drawers, after all? We’ll see. I am waiting for them to dry, as I had to glue them together in some places. Like I said, we’ll see.

Cutting all the pieces for six drawers took an entire day (I waited for a sunny one so I wouldn’t freeze to death out in the garage) because I am too cheap to go buy a dado blade set.

I hate building drawers. This is something I never knew about myself. I had to set them aside and think about them all weekend (as I am wont to do, come to find out). I was too scared to measure them to make sure they’d fit. I was positive they wouldn’t – they were such a nightmare to build. Finally, I bit the bullet almost a week later and took one downstairs to install it. It fit like they were made for each other. I fought the urge to do a tap dance on my roof with a megaphone, screaming, “It fits like a freaking glove!” (I may have done it on facebook instead of on my roof)

building and installing drawers

I installed the other two the next week (installing, to me, is WAY easier than building the drawers), and they fit even better than a glove, if that’s possible. Of course there was one minor set back when I got so excited that I didn’t even look at my drawer track when I put it on the drawer, and it was completely wrong (backwards). Fixed in no time. I rock!

I set aside a morning to build and install the last three drawers with confidence practically oozing from my pores. They didn’t fit. Not one. Plus, I did something to my thumb and it bled everywhere. I wrapped it in a paper towel and secured it with some blue painters tape that was handy. My husband would be so proud (which is why I texted him a picture). Also received multiple sliver wounds. Ouch. I felt defeated. I spent the rest of the afternoon (okay, 15 minutes – which was all I had before my kids got home from school) sitting in front of my space heater, feeling sorry for myself and eating truffles (did Ty foresee this when he gifted me so many for Christmas?). I texted him that it was a two-truffle day.

but a flesh wound - The Sawdust Diaries

I tried to salvage wood from the traitor drawers, but just got mad every time I went in the garage. I felt ridiculously gloomy and tired of building for a couple weeks.

February 24

I ended up not needing any more wood! Hooray! Somehow I made it all work with scraps (luckily the top drawer is only 3” deep, so it was easy to find scraps that would work). The top drawer is shorter than the others, but who cares? After the kids were all in bed I installed the drawers. They were harder than the others to install. I swore plenty. They’re IN!

Then, Lo, what is this? A router on Craigslist, complete with a router table, for $35?! Perhaps a router would make rebuilding the drawers easier (dado with a regular table saw blade much, anyone? No? Let me break it down for you: that equals 24 passes – if you’re lucky – per drawer). Having a router made me feel rejuvenated and ready to try again (retail therapy works across the board, apparently).

February 25

Skyped with Sandra today, she’s so cute. She talked me through the process of building doors and gave me some tips on finish (polyurethane inside of drawers, or paint with high gloss – I’m going to paint, since I had to use some wood filler in a few spots; polyurethane over turquoise if I am going to be scrubbing it, but poly turns white paint yellow over time, so use polycryllic for the white). I never know what she’s talking about cause I’m such an amateur, but she explains it over and over, and I eventually get the gist of it…usually the next day after I’ve turned it over in my mind a few thousand times. I am excited to start the drawer fronts and doors. But not this week. This week my house looks like a Marty Gras party exploded in the living room. It is Chocolate Extravaganza (the biggest school/community fundraiser of the year) this Saturday. After that, I will be able to breathe, hopefully, and concentrate on my project.

Doors and drawer fronts are tricky, but I marked everything really well with painters tape, made copious notes, and totally nailed it.

Building doors and drawer fronts

                                                    Just don’t ever look at the backs of them…

I have been priming and painting for what seems like months, probably because it has been. It feels like it will never end. But it has to.

beadboard panel doors and drawer fronts

I never learn to be patient. Instead I jump straight to, “Oh, crap. I HATE them! What am I going to do?” I always forget that once everything is painted (and not just primed), it looks better. Getting these puppies all turquoised-up made me love them.

Turquoise doors and drawer fronts for bathroom vanity cabinets

April 9

It took me several trips to the store, and the backs of my fronts (confusing enough for you?) look like wood peckers live in those drawers, but I got them on and they are like music to my eyes – if there is such a thing.

Installing doos and drawer fronts

May 2

I am practicing some serious self-restraint right now. I will not cry. And I will not (…wait…will I…?) tear my stupid cabinets into tiny popsicle sticks. I tried to install hinges just now. I bought a template to make it easier. Foolproof, you might say. Well the hinge people never saw this fool coming, apparently. Because they don’t fit. They tore little chunks out of my doors. I am ready to be done. I had planned to get hinges on today, and then get everything installed and trimmed tomorrow; the grand finale, right? Now I just want to burn down my house and walk away. I am seriously pissed and discouraged right now. I am waiting for my husband to get home, just in case he knows some secret magic trick that will make this all go away.

May 5

The moral of this story is don’t buy cheap hinges from your local home improvement store. Save yourself a lot of grief and order some nice ones. I ended up doing a lot of sanding and drilled two extra holes that I had to patch (I used small chunks of plywood, and then sawdust and glue to fill those huge cup hinge holes – it was a pain). I installed the upper cabinets tonight (which sucked – next time I will consider the placement of studs when planning the size of my carcasses). I hate them. Like, a lot. I feel more than ever like a complete failure. It’s been a rough week, and I’m sick, so maybe that’s why it feels like the end of the world.

May 10

I hadn’t stepped foot in the bathroom since I installed the uppers, because I just couldn’t face them. I spent the weekend away, hoping Ty would just finish the project for me, but knowing he wouldn’t (I have a strict no-helping-cause-this-is-my-project policy). Because I felt completely over it. Sick and tired, actually. Literally. I came home, saw the saw out, and ran downstairs. He had trimmed out the cabinets (the wall is so wonky, there were big gaps), and put the trim on top of them. I sat down on the floor and bawled while he told me that he knew I hadn’t wanted him to, but that he had been in that situation before: stuck, and thought maybe I wouldn’t mind a little help. I felt so relieved! Amazing how a few small feet of trim took me from hating the look of those upper cabinets to loving them. I am now reenergized and ready to finish this mo!

May 12, 2014

Caulked and primed everything that hasn’t been caulked and primed (at this point it’s hard to believe there is anything left in this world that I haven’t already caulked and primed). I am so scarred from my last hinge encounter, that I am putting off putting on those last two doors. But I am determined to get done this week, so I think tomorrow is THE day!

Custom Bathroom Vanity

Finale:  Mostly I feel a sense of relief that this experience is over. By the end I was so tired of looking at it, thinking about it, worrying about it, and knew all its imperfections so intimately, that I kind of didn’t want to look at it ever again. That has faded, and has been replaced with a feeling of accomplishment (thanks in large part to my husband, who countered all my bad attitude and negative remarks with positivity until I finally came around). Part of me – the perfectionist part – wants to build vanities repeatedly until I can do it in under an hour, perfectly, but the more dominant part of me – the part that wants to learn something new, and then once I do, I am no longer interested – has no desire to build a vanity ever again. BUT I have all sorts of other projects crouched in the corners of my mind, just waiting to pounce. And if what Sandra told me on Day 1 is true (“If you can build a vanity, you can build anything”), now I know I can figure them all out! By myself! It’s a good feeling.

diy custom vanity cabinets
diy bathroom vanity
bathroom vanity cabinets

Cara’s Office Reveal

My built-in office cabinets. are. done!!!!   So, remember when you gave birth and you were like, “I am never going to forget how my body felt”, and then three short months later, you totally were on board to possibly have another and go through it all again?? Yeah, it’s about the same after building a massive desk and office.

Built-in Office Cabinets- https://sawdustdiaries.com

In all seriousness, I am so glad I started with the hardest project in my house, because now all of the others seem small in comparison. I think I just need a small break before tackling my next build! I started this project in April and between working full time and traveling for my job, and kid activities, and summer vacations, I finally finished. Can I just say, I love how it turned out and can’t wait to unpack all of our stuff and fill those bookcases?!

As a little surprise, I am not even sure that Sandra knows that I added a corkboard wall and desk grommets for electrical cords, but I did and I think it will be very useful.  Here is all 23′ of desk and our beautiful office  furniture!

If you want to see how these built-in office cabinets came together read my Sawdust Diaries here:

Built-in office furniture. https://sawdustdiaries.com
Built-in office suite. https://sawdustdiaries.com
Built-in Office Cabinets https://sawdustdiaries.com
Built-in office suite. https://sawdustdiaries.com
Built-in Office Cabinets https://sawdustdiaries.com

This whole experience has been a wonderful one.  Sandra has the patience of a saint!  Thank you Sandra for sticking with me to the end!


I love Cara’s room!  It is beautiful, functional and pure awesomeness.   I am proud to have been a part of this DIY journey. ~Sandra

Read Cara’s full Sawdust Diary story: part 1, part 2, part 3, part 4, part 5, part 6, part 7,

You can get the free plans for the Cara Collection Office Furniture Built-ins At SawdustGirl.com here:

Cara’s Office – Part 7

At this point in the game, after the vacations, etc we have lost a little momentum.  Never fear though, Sandra has big plans for us that get us motivated again.  Now that the countertop is in and looking fabulous, we start in on building the upper bookcases.  These bad boys are large and in charge.  I am loving how they are coming together.  You will see that we even got the shelves level.  I also used my Kreg Shelf Pin Jig to drill all of the holes to hold my adjustable shelves.

It’s time to feel good!!  If you have ever used an oil based primer, you will totally get that statement.  (You may or may not get a slight buzz from the fumes 🙂 )Yep, had to pull all of the upper cabinets down in order to get them all primed.

Now that we have gotten through the hard part (or so we think), we decide at this point that we have the knowledge and super powers to go ahead and build built-ins in every single room of this house. (It’s amazing how much confidence you get once you build one bookcase).  Anyways, in this moment of euphoria, somehow a brand new table saw not only found its way into the back end of my husband’s truck, but also into my dining room!!  What the heck??  Seriously, he babied that thing and let it sit in the house until the first time he had to cut with it, which I insisted be done outside.  Now it has its own little corner of the garage.  And, can I just say, that thing has shaved off so much time!  I love it 🙂

table_saw

We now have all of the upper bookcases connected together and screwed into the walls.  I love the way it is turning out.  We have also started to put the baseboards back up.  Up next on our to-do list is to build the face frames for the bookcases, cut the shelves, and build some drawers and doors.  It is really coming together nicely. I can’t wait to be finished so that I can actually work at a real built in office and put my crafting supplies on the shelves!

Read all of Cara’s posts here: part 1, part 2, part 3, part 4, part 5, part 6, and next up is the Reveal which also has links to free plans for every single piece of furniture in Cara’s office!

Cara’s Office – Part 6

Today I am working on getting the layer of MDF that goes under the oak plywood countertops.  I don’t know if the pictures show the work space accurately or not, but I am actually very intimidated by this part of the project.  Our countertop is 23 feet long!!  This will be seen by everyone and needs to look good.  I used MDF for the under countertop part.  I rip them all to 24 inches wide and lay them out so I can start marking all of my cuts.

Now I get to cutting.

Cara's office built-ins-018

Now, don’t you get all jealous about my pink tool belt.  That was my mother’s day gift from my daughter!

Cara's office built-ins-019
Here I am doing a dry fit of the MDF before I drill it in.
Umm, yeah, instead of modeling my pink tool belt, I should have been paying more attention to my cuts.  I had some that were not exactly straight and I had to use a power sander to sand down the MDF to get them correct.

Cara's office built-ins-021

Now that all of the MDF substrate is in, I can start on the actual top that will be seen.

Cara's office built-ins-020

Unfortunately all of the lumber yards in my area only cater to the building industry and are only open 7-4 M-F, so I am unable to get around to them to see my choices of lumber.  Instead I went with the big box store and selected a cabinet grade oak plywood, and oak 1X2 for the facing.  Same as with the MDF, I rip the plywood into 24 inch width and use my Kreg Rip cut!

Cara's office built-ins-022

I also make all of my other markings and use the jigsaw for the smaller cuts.

Cara's office built-ins-024

Cutting wood is always fun!

Cara's office built-ins-023

Now that all of the pieces are cut, I use today to glue and nail down the top.

Cara's office built-ins-025
Cara's office built-ins-026

Now that the countertop is down, I move forward with adding the facing edge.

Cara's office built-ins-027

I use a router with a bit and give the facing a curved edge, since I will be working here every day.  I wasn’t too thrilled about having a sharp edge on my forearms all day.  The router worked like a charm!  I love the smooth round edge.

Cara's office built-ins-028

Next my husband sanded the top of the countertop, while I sanded the facing.  We used 220 grit to get a super smooth finish.

Cara's office built-ins-029

Here it is all ready to be stained.

Making oak plywood countertops

I really wanted to use Sandra’s method of Waterlox tung oil, however there is no store within a 50 mile radius of us that sells it, therefore I am forced into stain and polyurethane.  To prep the wood, I wiped it down with papertowels and then I wiped it down once with mineral spirits.

Cara's office built-ins-031

Then the fun begins!  I selected an ebony stain.  Because this is oak and is a hard wood, I had to let the stain set for 15 minutes and then iwpe it down.  I repeated the process the next morning.

Plywood countertops - oak

June 29th, 2013

I applied the second coat of stain and then I went swimming and took a nap and enjoyed the rest of my weekend.  I can honestly say that I.LOVE.IT!!  My countertops turned out better than I could have hoped for.  I still need to put three coats of polyurethane on them, but that will have to wait until tomorrow.

Staining the oak plywood countertops

Read all of Cara’s posts here: part 1, part 2, part 3, part 4, part 5, part 7, Reveal.

The free plans for the Cara Collection office furniture built-ins are available at SawdustGirl.com.

Cara’s Office – Part 5

Cara is cruising along with her office built ins! She always cracks me up with the way she describes her DIY adventures.  Need to catch up on her project? Here are part 1, part 2, part 3, part 4.

The day the bubble almost beat me, 2013

I like to think of this day as the day that damn bubble almost got the best of me!!

Now that all of the electrical issues are taken care of, now it’s time for me to get to business and install these bad boys into the walls.  I used a stud finder to determine where I needed to screw through the cleat and hopefully (fingers crossed) hit a stud, and no, I don’t mean my husband.

Before installing though, everything needs to be level.  I thought, sure, this will be easy.  I’ll use a couple of shims and that would be it.  Was I wrong!!  Seriously, there is not a darn thing straight in this house.  I lay in bed at night wondering if my house is built solid enough to not fall down.  My husband assures me everything is fine, however when we go to install these cabinets into the wall, three things are apparent:

1. My walls are bowed
2. The floors are uneven
3. My ceiling is buckled.

What the hell???

Every time I used a shim to level something out, it threw it out of whack somewhere else and that darn bubble in the level would move.  Doesn’t that darn bubble know that I need it perfectly in the middle????  I’m not trying to scare anyone at all, but this is probably the one and only time during this project where I had to step away for a while.  I finally decided that I’m not going to be able to get it exactly correct everywhere, and that I would have to live with it knowing that it wasn’t perfect.  My husband said that if I came into the house and this was an existing built in desk, I wouldn’t know the difference, and nor will anybody else coming in after me.  So, after hearing this and deciding to be a reasonable, rash person, I decided that as long as that darn bubble on the level was SOMEWHERE, ANYWHERE within the two black lines, that it would be fine. In the pictures that follow, you will see how many shims I used to get these cabinets level.

Cara's office built ins

See all of those sticks on top and under the cabinets??

Cara's office built ins

Ahh, that is all done and I can now concentrate on my upcoming vacation!

Read all of Cara’s posts here: part 1, part 2, part 3, part 4, part 6, part 7, Reveal.

The free plans for the Cara Collection office furniture built-ins are available at SawdustGirl.com.

Cara’s Office – Part 4

When Cara told me her technique for marking and cutting the electrical outlets in her office built-ins, I giggled …and then asked her to please document it with some pictures to share.  So this update is also a tutorial for what I think is a smart tip for marking outlet location.Unusual but very smart!  Catch up: part 1, part 2, part 3

Here are Cara’s tips for cutting outlet holes in EXACTLY the right location because after you spend months building them perfectly, the last thing you want to do is cut a big hole in the wrong spot during installation.

***Just make sure that before attempting any electrical work you make sure the electricity is off!***

marking and cutting the electrical outlets

June 1,

After putting so much sweat, blood and tears (YES, ALL THREE OF THOSE) into building these cabinets, I really didn’t want to screw up cutting a 2 ½ by 3 in box in the back of the cabinet, only to have it in the wrong place.

Enter stage left, Colgate toothpaste.

I honestly cannot remember who told me about this, or if I dreamed it or what, but it worked like a charm for us and it was minty fresh.  What I did was put four little dabs of toothpaste on the outlet front, and then I jammed the cabinet into the wall, where it was going to be positioned.  Then I pulled out the cabinet and these four little dabs had transferred to the back of the cabinet.

marking and cutting the electrical outlets

This gave us our jumping off point.  We drilled four holes inside to where the toothpaste was and cut out a small rectangle.

Custom built-in dsign at SawdustGirl.com

Then we trimmed it until the junction box fit in its hole.

Custom built-in dsign at SawdustGirl.com

Perfect fit! And still minty fresh!  🙂

Read all of Cara’s posts here:part 1, part 2, part 3, part 5, part 6, part 7, Reveal.

The free plans for the Cara Collection office furniture built-ins are available at SawdustGirl.com.

Cara’s Office – Part 3

If you missed Cara’s first two posts, catch up here: part 1, part 2

Today, after consulting with Sandra, I decided I should move forward with painting the walls.  As Sandra pointed out, this will avoid heartache later when I am trying to paint, after the cabinets are installed, and spilling paint on my new cabinets.  🙂

Cara's office built-ins-036

To get started, I have to pull down the crown molding in the area, since the book cases are going all the way to the top.  To my delight, I found that the 70’s were still alive under my crown molding and the popcorn ceiling was there.  No biggie, just thought it was funny.

Custom built-in dsign at SawdustGirl.com

Thank you Sherwin Williams for French Grey paint.  Adios to weird white striped walls with beige skirt, hello uniformity!  I decided to paint the wall at the end of the room with the French doors a bright teal color, since the wall is not that big, and it makes a bold statement.

Custom built-in dsign at SawdustGirl.com

I finished up the second coat of paint on the walls and moved all of the cabinets into place.  I also touched up the cabinets with the white paint.

Custom built-in dsign at SawdustGirl.com

This is the middle cabinet that will hold our three printers (don’t ask), but for those that are curious, I have a work printer, we have a color printer, and I have a wide format printer for scrapbooking.

Custom built-in dsign at SawdustGirl.com

Now, what to do with those pesky wires and plugs??  Stay tuned…

Custom built-in dsign at SawdustGirl.com

Read all of Cara’s posts here: part 1, part 2, part 3, part 4, part 5, part 6, part 7, Reveal.

You can get the free plans for the Cara Collection office furniture built-ins over at SawdustGirl.com.

Cara’s Office – Part 2

Follow along as Cara’s project journey continues. If you’re just joining in, catch up on Part 1 first.

April 27th

Today got off to a great start. We covered the floor and prepared to start priming all of the cabinets.

building_office_built-ins

The priming went smoothly, but it was a bit tiring on the ol’arm. I have to admit, after being so scared of using the big tools; I kind of missed it today. The painting was not as gratifying as creating the bases, but it has to be done!

Cara cabinets15

Once all of the cabinet bases have their first coat of primer, I take a much needed brake in the pool.

Cara cabinets14

Tick Tock, tick tock, tick tock…literally a picture of paint drying.

built-in-office_cabinet_construction

One wardrobe change back into work clothes, and the assurance that the primer is dried, I start screwing the bases together in order to get proper measurements for the face frames. This took a little longer than I thought it would. Getting everything flush and level, took both me and my husband. I’m so glad he was there to help me!

Cara cabinets12

After attaching the bases to each other, I  used my Kreg Shelf Pin Jig, and a block of MDF to drill the hole for the shelf pins. Since I only need about 3 holes in these bottom bases, it really was an easy job.

Cara cabinets10

So, as you can tell, it is now dark, and like I said, connecting the bases took me longer than I thought it would, but I was determined to get through the “to-do” list assigned to me by Sandra, so I continued on to make the face frames. I used the Kreg Jig to drill holes in the face frame material.

Cara cabinets9

Well, I didn’t get as far as I had wanted to, but I did get one face frame put together and attached. I have one more cut and ready to be assembled, and I will need to cut the face frame out for the middle section.

May 2, 2013
Ok, over the past couple of days, I have managed to finish building and attaching all 3 face frames for my 3 sets of cabinet bases. I haven’t quiet caught up on my to-do list, but I am close. My husband was kind enough and used wood filler to fill in where we nailed in the face frame, so now I just need to find time to prime it before the weekend!

Cara cabinets8
Cara cabinets7
building office cabinets

May 3rd, 2012
Today the face frames got their first coat of paint and we sanded down all of the cabinets. Unfortunately, I don’t have a picture to document that. Oh well, I swear it is done!

May 4, 2013
Today we had some family commitments…Ok, so we went to an amusement park, but family commitment sounded so much more like something we “had” to do, rather than the wild crazy fun we were having! Oh well, sometimes you have to get out there and just be crazy. Anyways, due to our very important commitment, we didn’t get started on our building until 4 in the afternoon. So, our assignment for this weekend was to build 6 legs for the cabinet bases. Given my time constraints, my goal for today was just to get everything cut so we could build tomorrow.

building office cabinets

May 5, 2013
And we are back on track….
Today we knocked out the six legs fairly quickly. I consider it a good day when I only have to bug consult with Sandra once during the day! After building the legs, we needed to sand all of them smooth, but I only got one done. The rest will have to wait for me to do during the week. Unfortunately, I have a dinner to make, laundry to do, and homework to round up, so sanding gets bumped to low priority. Plus, I have to go out of town this week for work, so I am hoping the sanding fairy, aka my husband, will have pity on me and sand these bad boys for me. Oh, who am I kidding? He’s probably counting down the minutes until I leave so he can have full control over the project and play with all of the tools we’ve been buying!

building office cabinets

Here are the legs sitting next to each cabinet base. I know is sounds totally crazy, but my husband and I stand in there and discuss the building of the cabinets, how it is all coming together so well, how we can’t wait until it is all done , and how we are going to transform our house with these new skills we have learned.

building office cabinets

There is this peaceful silence where we both drift into our daydream of an organized, fully functioning house…then the kiddo screams, “is dinner ready”? And we are both startled back to reality and off we go again to do the things that make up our life.

Read Cara’s next posts part 3.

You can also get the free plans for the Cara Collection office furniture built-ins.

Cara’s Office – Part 1

Cara and family just moved into their new home about a month ago and they were ready to jump in feet first to get this space ready to use as an office and TV room.  You walk through those French doors to the pool so the middle of the room is left open so there is a nice walkway but the sofa will sit against the wall exactly opposite a mounted flat screen tv.

Custom design for office built-ins

I think it’s going to be an awesome multi-purpose, highly functional and gorgeous room.

Here’s Cara’s Project Diary…

March 22

So, we have officially been in this house for 4 weeks.  We were relocated to this new area for my husband’s career.  It was a good move, however we lost a lot of space due to the increase in housing costs in our new location.  So, where do I start?   Well, by downsizing, we gave up a craft room, separate office, and a family room.  Now, in the new house, I basically have a room with two very long walls, 19 feet to be exact and no storage.  What’s a girl to do??  Call in the big guns and reach out to Sandra.

Here is where we started.  A lot of boxes and a hot mess.  Things I love=tile floor, can lights; things I hate about this room=weird paint job, crappy chair railing, no storage.

Now, don’t you go feeling sorry for me, because beyond those French doors is a large swimming pool and private oasis.  It’s just this room that lacks a defined purpose.

So, the basic plan for this room is to have a wall of built ins that will include two desks, bookshelves, and custom shelving for my printers.  This room will have a coach in it, and a flat screen.  So, we now have a plan to gain back our office, craft room, and family room.  It will be amazing!!

April 9

Ok, so this is the week we really start!  Plans are being drawn up and we have our first instructions – clean out the room and remove the baseboards.  Umm, ok.  Where am I going to put all of this crap??  Thank goodness for Facebook online garage sales.  The desk went for a cheap $50, I threw out some things, and the rest remains in boxes to be unpacked once my built in desks, cabinets, and bookshelves are ready.

We removed the baseboards and to our unfortunate delight, we uncovered a moldy corner.  My husband, fortunately for me, wrote his dissertation on mold, and knew exactly what to do, so I promptly put him on clean up duty.  He did a fabulous job!

April 13

Alright, this is the big day.  This is when I find out if I am made of the stuff that champions are made of (ok, wood working champions).  We got a little bit of a slow start, but we headed out to our local big box store.  OMG, what the heck, is everyone and their dog here today???  Seriously, parking was a mess.  Everyone who thinks they can build something was here.  Poor fools, if only they were as professional as me with my folder of instructions from Sandra and my fancy coffee cup.  Let’s see here, oh we want the big boards.  Crap!  Those are big boards.  No biggie, I’ve got my husband and 7 year old daughter, we’ve got this.  We need how many?  Ok, time to flag down a person in a vest.  10 minutes later, cart loaded with big sheets of wood. Check.  Next, we need something called “hardboard”.  We need what??  Ok, I can do this.  My husband and I start going up and down the aisles.  Ok, can’t find it.  I need to make a quick call to Sandra, who immediately is able to direct me to what I need, since the store associate wasn’t able to help us at all.  Hardboard loaded, check.  Screws, nails, and one bathroom break, and 30 more minutes later we are completely loaded and heading out to build something great.

We get home, and start getting set up when my daughter reminds me of a birthday party she is supposed to be going to.  Oh man! A change of clothes and some makeup and we are out the door.

I finally make it home around 5:30 and I am ready to start sawing!!!  Or so I thought, after 5 minutes of said daughter begging to go swimming, hubby and I give in and go for it.  That literally lasted long enough for me to get my left big toe in.  Let’s just say it isn’t warm enough yet.

Now I am ready to get started on this project, what’s that you say family, you want to eat dinner??  Are you kidding me??  Can a woman just get some time to cut her wood or what??  Ok, KFC it is then.  Gobble gobble gobble.  Now, I am going to cut some wood.

I used the Kreg Rip Cut and loved it!!

I got some cuts made, but as you can tell, it is really getting dark and we have close neighbors, so I called it a day and vowed to finish my cuts the next day and build!!

April 14

Today was a great day! I was able to finish all my cuts for my first four cabinet bases.  I think I only bugged Sandra about 100 times, but she was always there for me and got me through all of my questions.

So, once we got to the cuts that were too large for the Kreg Rip Cut, we bought the Bora clamp, which allowed us to make straight wide cuts.  I finished making my cuts.

Then the building begins!

I did everything just as instructed by my fearless leader!

Isn’t that the cutest nail gun??  Don’t tell my husband, but it’s purple!!  How did he end up with a purple nail gun??  I don’t know, but I just claimed it as my own.

Yes people, that is the smile of achievement!!  It only took me two days, but darn right I am ecstatic!!

Here it is, in all of its glory!!  Now only three more to go this week!  Now that I have one under my belt, hopefully the rest will go a little faster.

Me: It is SO EXCITING when you build your first ever cabinet and it’s Solid — and it’s Square. It’s the most beautiful thing in the world at that moment.  Cara’s cabinets look beautiful! It does get easier and go faster after you get it down.  The first one is slow because it’s all new.  You’re apprehensive, nervous and excited.  Then you learn all the tricks and you’re off and running.

Read Cara’s next post: part 2.

Verified by MonsterInsights